Outlook 2010
Follow this procedure to create a new e-mail account in Microsoft Office Outlook 2010. To modify an existing e-mail account, select the account in the list of e-mail accounts, click Properties, and proceed from Step 6. A summary of all e-mail settings is on the E-mail Client page.
- Start Outlook 2010.
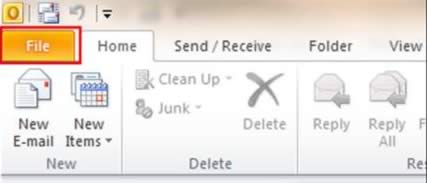
- Click the File menu
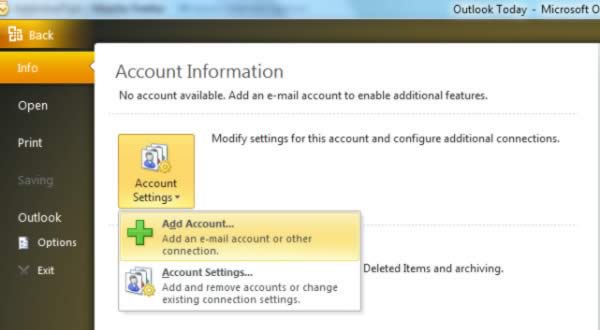
- Click the Info tab, click the drop down button in Account Settings and click Add Account.
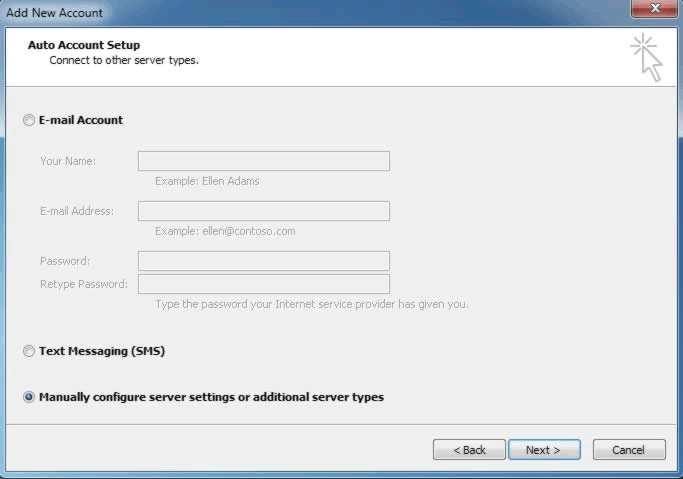
- On the Auto Account Setup window click Manually configure server settings or additional server types at the bottom of the window and then click Next.
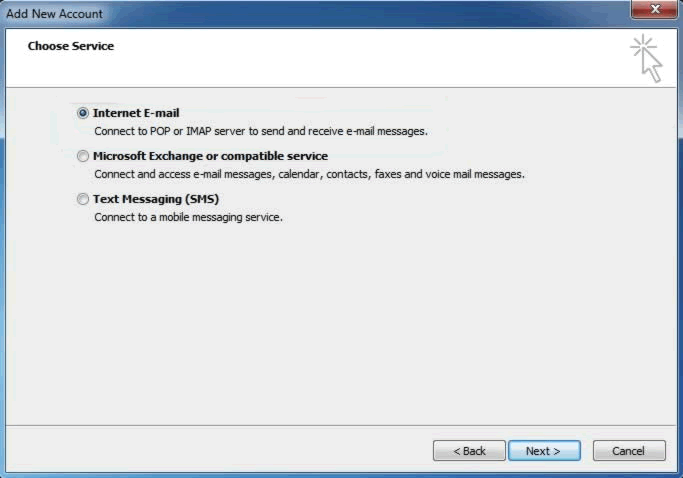
- In the Choose Service dialog box select Internet E-mail and then click Next.
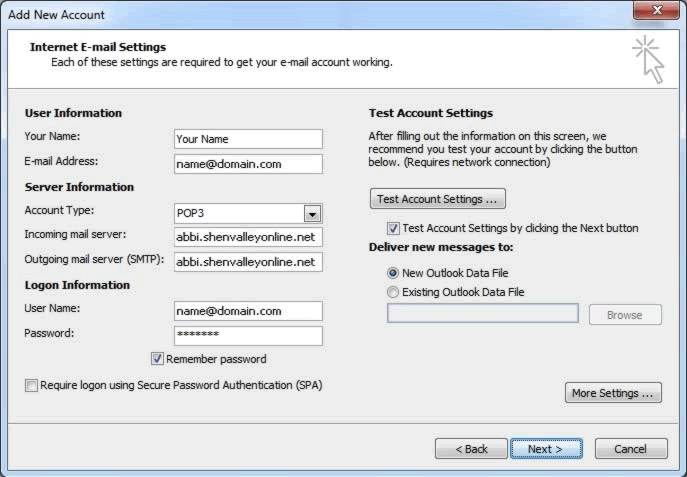
- On the Internet E-mail Settings page, do the following:
- In the User Information section enter Your Name: and E-mail address:
- In the Server Information section select POP3 for the Account Type:, enter abbi.shenvalleyonline.net for both the Incoming mail server: and the Outgoing Mail Server (SMTP): fields.
- In the Login Information section enter the e-mail address in the User Name: field and the Password in the Password: field. Check the Remember Password box to have Outlook remember your password.
- Click More Settings.
- Click the Outgoing Server tab and check the box My outgoing server (SMTP) requires authentication and then check Use same settings as my incoming mail server.
- Click the Advanced tab and in the section Server Port Numbers
- For Incoming Server (POP): Check the box This Server requires an encrypted connection (SSL) and enter 995 in the box if it doesn't use that value automatically.
- For Outgoing Mail (SMTP): Select SSL from the Use the following type of encrypted connection: drop-down and enter the 465 in the box or select TLS from the Use the following type of encrypted connection: drop-down and enter the 587 in the box.
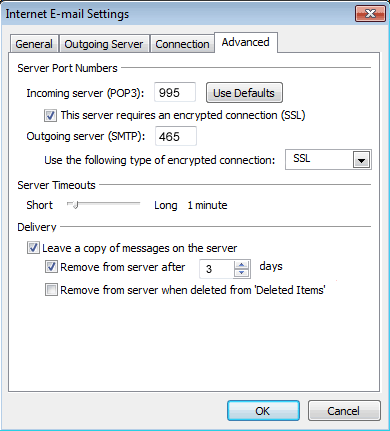
- If you want to use multiple devices or clients (e.g. computer and smartphone or Outlook and Webmail) to receive mail, check the Leave a copy of the messages on server box, check the Remove messages from server box and select 3 from the day(s) drop-down. DO NOT check the Remove messages from server box if you only use one device or computer to check your e-mail.
- Click OK.
- Click Next.
- Click Finish.
